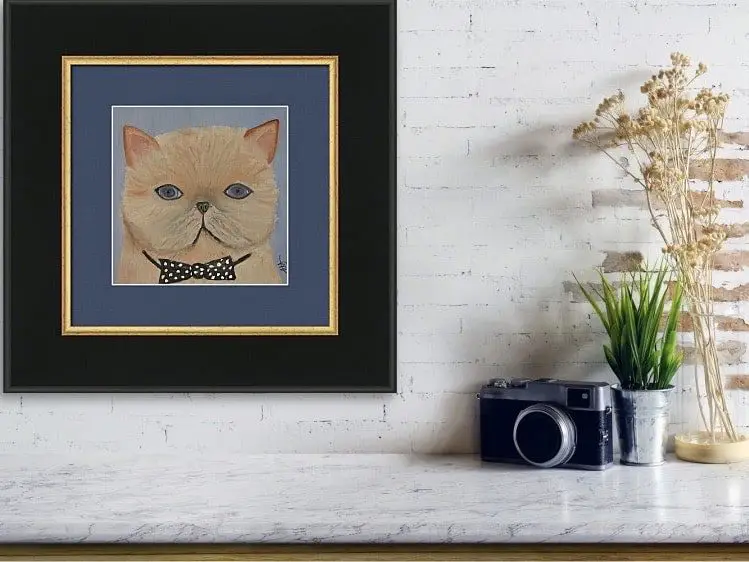
I love to paint cats as cats have such unique features to paint, and so they make a great subject matter. But many beginning painters may find painting a cat to seem daunting.
I have outlined seven easy steps to help you paint a cat as a subject matter. These seven basic steps include 1) layout and plan your painting using Procreate on your Apple iPad, 2) print out your Procreate layout in the size of your canvas, 3) prepare to use your Procreate layout to place your artwork onto the canvas, 4) use studio charcoal to outline the Procreate layout on the canvas 5) fill in any missing lines of the design 6) start painting a base coat and 7) add details to your painting.
Table of Contents
- Mastering Feline Portraiture: A Seven-Step Guide to Painting Cats
- Related Questions
Mastering Feline Portraiture: A Seven-Step Guide to Painting Cats
Embarking on the artistic journey of painting a cat can be both exciting and challenging. Cats, with their elegant forms and captivating expressions, make for a fascinating subject. In this guide, we present seven fundamental steps to help you capture the essence of these graceful creatures on canvas.
From understanding feline anatomy to mastering the subtleties of their fur and features, each step is designed to guide you through the process of creating a beautiful and realistic portrayal of a cat.
Whether you are a beginner looking to learn the basics or an experienced artist seeking to refine your skills in animal portraiture, these essential techniques will enhance your ability to bring the charm and character of cats to life in your artwork.
If you follow these seven basic steps you can paint some amazing paintings of your favorite cat.
Step 1 – Layout and Plan Your Painting
One of the most important things you can do whenever you start painting is to have a plan in mind. Having a plan will help to save you time in the long run and help give you the best-completed painting
I always lay out my oil paintings using my Apple iPad and the Procreate app. You can do a lot of amazing things with this Procreate app.
To use Procreate you need to have an Apple iPad and pencil. I prefer to use the Apple iPad Pro. Procreate is not expensive (only $9.95 for the entire program), but you must invest in a decent Apple iPad and an Apple pencil.
In many places around the world, Apple will teach classes in their stores about Procreate and the Apple iPad. They will allow you to try out the Apple iPad and Procreate before you purchase it. If you have any questions about this program please visit Apple.com or go to your local Apple Store.
I love to use Procreate as it allows me to work off the canvas before I actually start to paint anything. One of the great things about this is that it will give me an idea of what the painting should look like before actually starting to paint anything on the canvas.
To find out more about Procreate and laying out your paintings with Procreate can read our blog Procreate to Layout your Oil Paintings, What You Need to Know by clicking here. We show you why we like to use Procreate to lay out our paintings.
We really feel Procreate is a great tool to use to lay out your paintings before you put anything onto the canvas.
Watch our video below on the steps we use to lay out our paintings, especially our dog paintings on Procreate.
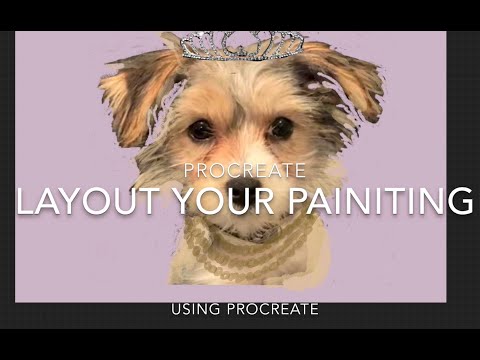
The great thing about using Procreate is that it can give you an idea of what your painting may look like before you even start to paint it. I find that having an idea of what the painting could look like really helps me throughout the entire painting process.
I like to think of this step as the same as how the old masters would sketch out and draw out their paintings before they actually painted anything. Except, today by using this technology and by using Procreate this can be a much faster process than ever before.
Step 2 – Print Out Your Layout
When painting a cat, one of the most important things is to get the proportions correct for your painting. If the proportions are not correct it can be a huge problem.
When I am painting a subject like a cat, and I know it will require that I get the proportions very close, I will print out my Procreate layout in the size I will be painting. If, for example, my canvas is 20″ x 20″ then I will print my layout in a 20″ x 20″ or 21″ x 21′ size.
Sometimes, I will print out the larger size of my print in black and white. But I always print out the layout also in color so I can use the color print as my reference for my painting.
Today, with all the technology we have available, there are so many ways we can use technology to help you with your painting. Certainly, one way is to get a very good printed copy of your layout so that you can use that printed copy as the model for your actual painting.
Step 3 – Prepare to Layout On The Canvas
Once I have printed my Procreate layout print in either a large black-and-white print or a color print, I will use this as the basis to put an outline onto my canvas. This helps me ensure I get the proportions as close as possible.
There are two methods that I use to lay out my cat painting on canvas and to get my proportions as close as possible:
- Trace the design layout onto your tracing paper – Sometimes, I will trace and outline the Procreate layout print onto tracing paper. This will give me the shape and lines that I need to get accurate proportions to put onto my canvas.
- Use the Procreate Print – Other times, I skip the step of tracing and outlining onto the tracing paper and will use the Procreate layout print to outline directly onto my canvas. Lately, I have been using my Procreate layout so as not to have to do the extra step of tracing onto the tracing paper. But, if I find the print needs it then I will use the tracing paper to outline what I am painting first.
Step 4 – Use Charcoal to Put On The Canvas
Now that I have the print all set up, either with the tracing paper or the actual print copy, I am now ready to put the design onto my canvas.
Here is how I will do these steps:
- Use either the tracing paper or print in the exact size to put the design on my canvas. I will then put charcoal all over the back of the tracing paper or the print. The charcoal I use is similar to this basic Studio Charcoal. You can find out more about the Charcoal by clicking here.
- I will tape the tracing paper or print it on my canvas by using masking tape. Here is a good brand of masking tape that you use or find something similar. Any kind of basic masking tape will work. The reason I use masking tape is when you are tracing the design onto the canvas, you do not want the paper or canvas to move. Furthermore, masking tape will not damage the canvas.
- Trace or outline the areas you want. I will try to outline as much of the painting as I can. Especially when I am painting a cat. I will also try to outline the areas that have shading or color changes for my cat. This way, when I start to paint the cat, I do not need to guess so much as to where to put the shading or other changes of color on my canvas.
- Many times I will trace using a colored pencil or pen on the topside of the Procreate layout print. I do this so that I can clearly see where I have already traced. I have found that if I do not do this, I can sometimes forget an entire section or part of my design and will have to try to match it up again.
- Once I have completed this step I will carefully take the tracing paper or print off the canvas and make sure I have put in all the lines that I need to on the canvas.
Step 5 – Fill In the Lines on the Canvas
Once I have taken the tracing paper or my layout paper off the canvas, I will check the lines drawn. If you did not use enough of the charcoal on the back of the tracing paper or paper, you may have missed areas of the design. This is why, with the tracing paper method you can more easily go back to try to line up the design and fill back in the lines. When using just the Procreate layout print method, this is much more difficult.
Using my pencil or even the charcoal, I will start to pencil or fill in the lines or areas that I need to or may have missed. Sometimes, the charcoal is dark enough, and do I do not need to do anything else for the design. Other times it may need to go over the designs with a light pencil sketch.
My goal for all these steps is to have a design roughly sketched out on the canvas that is defined enough so that I can really get the proportions correct for my paintings.
Step 6 – Start With a Base Coat
I always start my painting with a detailed base coat. The great part of this is that now that I have an idea of where the colors and shading will be, so many times during this base coat painting, I try to get as close to how the painting will look as possible.
Here are important things to remember when painting a cat:
- Carefully check your proportions. Proportions are very important when you are painting a cat painting. So you need to ensure that you have the correct proportions during this stage or the painting will not be correct.
- The base coat should be as close to the colors you want as possible. If your cat is white, paint the base coat white in the appropriate area. If the cat is to be black, then paint the black tones for your base coat. Use those colors for your base coat, which are as close to the colors you want for the finished painting. This is another reason why to lay things out on Procreate beforehand and to have a clear plan before you start painting is such an important step.
- Add as much detail as you can to the painting. I find adding as much detail as possible during this base coat phase helps save me time for my entire painting.
Step 7 – Paint Details
Once you have painted your base coat, you are ready to paint the finer details on your base coat. When I paint a cat, it usually takes me another two or three coats and sometimes even four or five coats of paint before I am completed.
How many paint coats I need to paint will depend on what I am painting or, many times how close to get to what I need on the base coat of paint. That is why I say the proportions and base coat are so important.
Some things to consider when painting cats:
- Mix colors on the canvas – When I am painting a cat, especially when painting the fur of cats, I will mix a lot of the colors on the canvas, not on the palette. This helps give some of the cats’ natural variations on their fur colors.
- Use a lot of white – I tend to use a lot of white colors for example, white with brown or white with black or grey when I do the fur coat of a cat. The brushing strokes can help it look more like fur.
- Don’t be afraid to add to the eyes – Cats’ eyes are just as important to paint, and cats have such beautiful eyes. I will often use bright colors when painting the eyes of my cat paintings.
- Consider using deep indigo blues instead of black – I love indigo blue and use it a lot in all my paintings. Many times I will use it in place of the color black. So do not be afraid to use some deep colors like indigo blue to replace some of the harsher colors like black.
Cats are really great subject matter to paint. They are not only amazing pets to have but also a fun subject matter to paint. If you can follow these seven simple steps, painting a cat can also be relatively easy to paint.
Anita Louise Art is dedicated to art education, great artists, and inspiring others to find and create their art. We love art that uplifts and inspires. #ArtToMakeYouSmile! #ArtToMakeYouHappy!
If you are interested in seeing any of my art, you can find out more by clicking here. If you are interested in what inspires me and my paintings, you can discover more by clicking here.
We have a free newsletter and would love you to be part of our community; you can subscribe to the newsletter by clicking here. I would be happy to talk to you if you have any questions. You can reach me, Anita, by clicking here.
Subscribe to our Anita Louise Art YouTube Channel filled with great videos and information by clicking here.
Join us for our podcast “5 Minutes With Art.” Spend 5 minutes a week with us to discover and learn about great art and artists. You can find out more about our podcast by clicking here.
Related Questions
What Are Some Great Cat Paintings?
There are many great artists who have painted cats as part Here are my top 15 picks of artwork that feature cats as all or part of the subject matter. Some of the artists and artwork I have chosen are famous artists like Renoir or Carl Bloch, but others are lesser-known artists like Carl Kahler, Ole Morton Berg, or Jose Luis Lopez Galvan. But all these artists have one thing in common they painted cats as part of their subject matter or as the entire subject matter in their art.
You can read more about some great cat paintings 15 Paintings Featuring Cats, My Top Picks by clicking here.
Who is Henriette Ronner-Knip, Who Paints A Lot of Cats?
Henriette Ronner-Knip came from a family of artists. At an early age, she became in charge of the family’s finances and other legal obligations so she started to paint. She was able to sell her first painting at age 15 year old. Later when she was married and her husband became her manager, and Henriette continued to paint. She is famous for her many beautiful paintings of cats and dogs. One reason she chooses to paint dogs and cats as a subject matter is that during the Victorian era, having a pet in your household was popular.
You can read more about Henriette Ronner-Knip by reading our blog Henriette Ronner-Knip (1821-1909), Painter of Cats & Dogs by clicking here.