
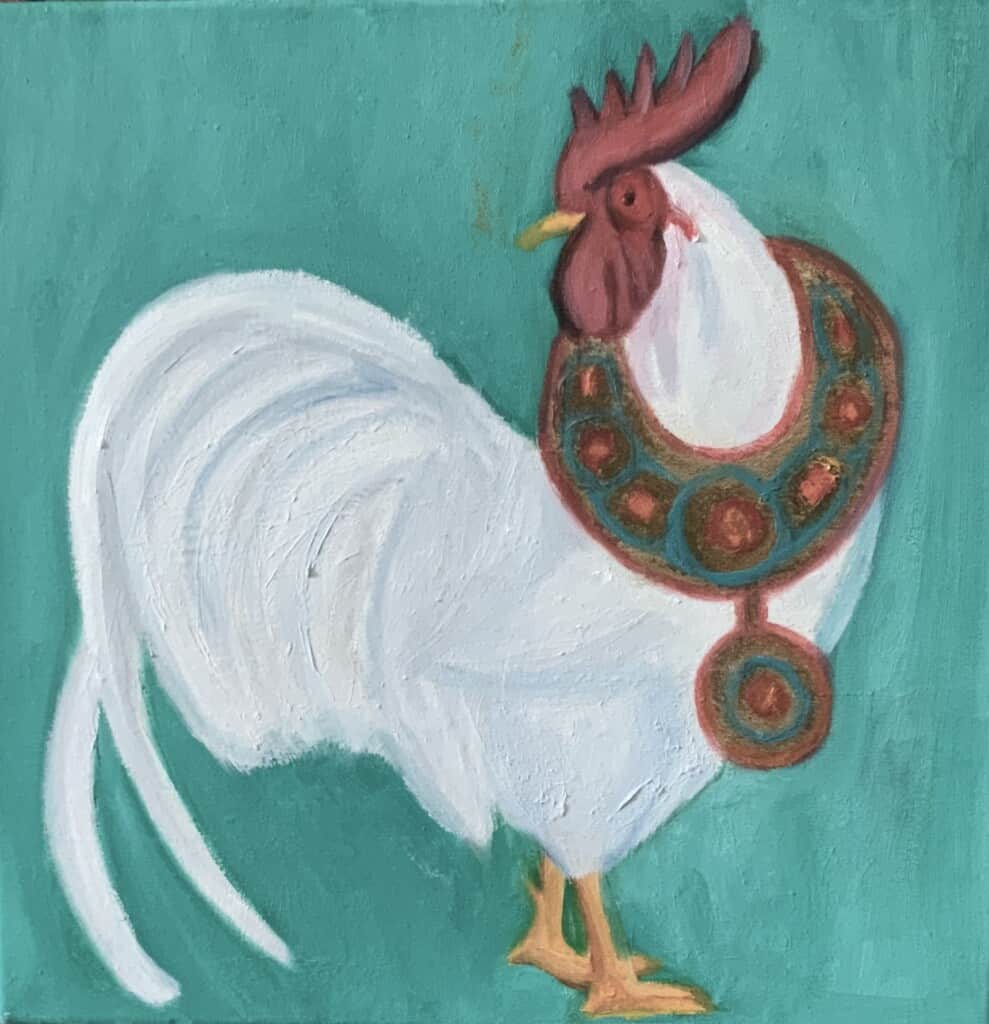
I love to paint animals as I find them a very interesting subject matter to paint. One animal I have started to paint recently has been all kinds of birds. To some artists, it can seem difficult to paint a bird.
To help make the painting of a bird easier, I have outlined 7 easy steps to help you paint a bird as a subject matter. These seven basic steps include 1) layout and plan your painting using Procreate on your Apple Ipad, 2) print out your Procreate layout in the size of your canvas 3) prepare to use your Procreate layout to place your artwork onto the canvas 4) use studio charcoal to outline the Procreate layout on the canvas 5) fill in any missing lines of the design 6) start painting a base coat and 7) add details to your painting.
Table of Contents
- Mastering Bird Painting: 7 Simple Steps for Artists
- Related Questions
Mastering Bird Painting: 7 Simple Steps for Artists
Painting animals has always been a fascinating and rewarding challenge for me, and recently, I’ve delved into the world of avian art, exploring the diverse and captivating realm of birds. Birds, with their intricate details and vibrant plumage, can initially appear daunting to many artists.
However, the right approach can make capturing their essence on canvas simpler. To assist fellow artists in this endeavor, I’ve compiled a step-by-step guide outlining seven easy-to-follow techniques to effectively paint these feathered subjects
If you follow these seven basic steps, you can paint some amazing paintings of all your favorite bird subjects:
Step 1 – Layout and Plan Your Painting
One of the most important things you can do whenever you start painting is to have a plan in mind. This plan will help save you time in the long run and help give you the best completed painting possible.
I always lay out my oil paintings using my Apple iPad and the Procreate app. You can do a lot of amazing things with this Procreate app, and I find it helps to save me a lot of time in the long run.
To use Procreate you need to have an Apple iPad and pencil. I prefer to use the Apple iPad Pro because it works better with the Procreate app. Procreate is not an expensive program (only $9.95 for the entire program- no monthly fees or costs), but you should invest in a decent Apple iPad and an Apple pencil.
In many places worldwide, Apple will teach classes in their stores about Procreate and the Apple iPad. This is really great service, and I have found that many of the Apple staff who are teaching these classes are also artists, so they have some great insight into how to use Procreate.
These free classes that Apple gives will allow you to try out the Apple iPad and Procreate before you purchase it. If you have any questions about this program, please visit Apple.com or go to your local Apple Store.
I love to use Procreate as it allows me to work off the canvas before I actually start to paint anything, especially something as complicated as painting a bird. One of the great things about this is that it will give me an idea of what my bird painting will look like before I actually start to paint anything on the canvas.
To learn more about using Procreate and laying out your paintings with Procreate, read our blog, Procreate to Layout your Oil Paintings, and What You Need to Know by clicking here. We show you why we like to use Procreate to lay out our paintings. We feel Procreate is a great tool to lay out your paintings before you put anything onto the canvas.
You can watch our video below on the steps we use to lay out our paintings. Though this video is about painting a dog, we use the same steps for painting a bird:
The great thing about using Procreate is that it can give you an idea of what your painting may look like before you even start to paint it. That is one of the main reasons I love it so much. I find that having an idea of what my painting will look like, it really helps me throughout the entire painting process.
I like to think of this step as the same as how the old masters would sketch out and draw out their paintings before they actually painted anything. Except, today by using this wonderful technology and by using Procreate, this can be a much faster process than ever before.
Step 2 – Print Out Your Layout
When you are painting a bird, one of the most important things is to get the proportions correct for your painting. If the proportions are incorrect, it can be a huge problem, and the bird will not look right.
When painting a subject like a bird, and I know it will require that I get the proportions very close, I will print out my Procreate layout in the canvas size I will be painting. If, for example, my canvas is 20″ x 20″ then I will print my layout in a 20″ x 20″ size.
Sometimes I will print out the larger size of my print in black and white due to the cost of printing out a large size in color. The black and white works just fine to do the layout with.
But I always print out the layout in color, even if it is a smaller size, so I can use the color print as my reference for my painting.
Today, with all the technology we have available, there are so many ways we can use technology to help us with our painting and to become better artists.
Indeed, one way is to get a very good printed copy of your layout so that you can use that printed copy as the model for the actual painting of your subject matter, like a bird.
Step 3 – Prepare to Layout On The Canvas
Once I have printed my Procreate layout print in either a large black and white print or a color print, I will use this as the basis to actually outline the bird onto my canvas. This helps me ensure I get the proportions as close as possible.
There are two methods that I use to lay out my bird painting on the canvas and to get my proportions as close as possible:
Trace the design layout onto your tracing paper
Sometimes, I will trace and outline the Procreate layout print onto tracing paper. This will give me the shape and lines that I need to get accurate proportions of my bird that I can then put onto my canvas.
Use the Procreate Print
Other times I skip the step of tracing and outlining onto the tracing paper and will use the Procreate layout print to outline the bird directly onto my canvas. Lately, I have been using my Procreate layout print so as not to have to do the extra step of tracing onto the tracing paper.
But, if I find the print or subject matter needs it, then I will use the tracing paper to outline what I am painting first.
Step 4 – Use Charcoal to Put On The Canvas
Now that I have the print all setup, either with the tracing paper or the actual print copy, I am ready to put the design of the bird directly onto my canvas.
Here is how I will do these steps:
Trace the Bird Shape Onto Tracing Paper
Use the tracing paper or print of the bird in the exact size to put the bird design on my canvas. I will then put charcoal all over the back of the tracing paper or the print of the bird. The charcoal I use is similar to this basic Studio Charcoal. You can find out more about the Charcoal by clicking here.
Tape The Tracing Paper To Canvas
Using masking tape, I will tape the tracing paper or print the bird on my canvas. Here is an excellent masking tape brand you can use or use. Any kind of basic masking tape should work. The reason I use masking tape is when you are tracing the design onto the canvas, you do not want the paper or canvas to move or get damaged.
Outline the Area You Want To Paint
Trace or outline the areas you want to paint for the bird. I will try to outline as much of the painting as possible, especially when painting a bird. I will also try to outline the areas with shading or color changes for my bird. This way, when I start to paint the bird, I do not need to guess so much as to where to put the shading or other changes of color of the bird on my canvas.
Many times I will trace my bird using a colored pencil or pen on the topside of the Procreate layout print. I do this to clearly see where I have already traced the bird. I have found that if I do not do this, I can sometimes forget an entire section or part of my design and will have to try to match it up again.
Once I have completed this step, I will carefully take the tracing paper or print off the canvas and make sure I have put in all the lines that I need on the canvas to paint my bird correctly.
Step 5 – Fill In the Lines on the Canvas
Once I have taken the tracing paper or the layout paper of my bird off the canvas, I will then check the lines drawn on the canvas. If you did not use enough of the charcoal on the back of the tracing paper or paper, you may have missed essential areas of your bird design.
This is why with the tracing paper method, you can more easily go back to try to line up the bird design and fill back in the lines. This is much more difficult to do when using just the Procreate layout print method.
Using my pencil or charcoal, I will pencil or fill in the lines or areas of my bird design that I need to or may have missed. Sometimes, the charcoal is dark enough, and I do not need to do anything else for the design. Other times, I may need to review the bird designs with a light pencil sketch.
My goal for all these steps is to have a bird design roughly sketched out on the canvas that is defined enough so that I can get the bird proportions correct for my paintings.
Step 6 – Start With a Base Coat
I always start my painting with a detailed painted base coat of the bird. The significant part of this is that now that I have an idea of where the colors and shading will be, so many times during this base coat painting, I try to get as close to how the painting of my bird will look as possible.
Carefully check your proportions and colors
Proportions are very important when you are painting a bird painting. So you need to ensure that you have the correct proportions of the bird, or the painting will not be correct.
The bird base coat should be as close to the colors you want as possible. If your bird is white, paint the base coat white in the appropriate area. If the bird is to be black, then paint the black tones for your bird on the base coat.
Use those colors for the base coat of your bird, which are as close to the colors you want for the finished bird painting. This is another reason to lay things out on Procreate beforehand and having a clear plan of painting the bird before you start painting is such an important step.
Add as much detail to the bird painting as you can. I find if I can add as much detail to my bird painting during this base coat phase, it helps save me time for my entire painting.
Step 7 – Paint The Details
Once you have painted your base coat, you are ready to paint the finer details of your bird painting. When painting a bird, it usually takes me another two or three coats and sometimes even four or five coats of paint before I am completed.
How many paint coats I need will depend on what I am painting or how close to get to what I need on the base coat of paint. That is why I say the proportions and base coat are so important when painting birds.
Here are some things to consider when painting birds:
Mix colors on the canvas
When I am painting a bird, especially when painting the feathers of birds, I will mix a lot of the colors on the canvas, not on the palette. This helps give some of the natural variations that the birds have for their feathers.
Use a lot of white
I tend to use many white colors, for example, white with brown or white with black or grey, when I do the feathers of a bird. The brushing strokes can help it look more like feathers.
Consider using deep indigo blues instead of black – I love indigo blue and use it a lot in all my paintings. I will often use it instead of the color black as I find it to be a less harsh color. So do not be afraid to use deep colors like indigo blue to replace harsher colors like black.
Birds are really great subject matter to paint. They are not only beautiful animals, but they are a fun subject matter to paint. If you can follow these seven simple steps, painting a bird can also be relatively easy to paint.
Anita Louise Art is dedicated to art education, great artists, and inspiring others to find and create their art. We love art that uplifts and inspires. #ArtToMakeYouSmile! #ArtToMakeYouHappy!
If you want to see any of my art, you can find out more by clicking here. If you are interested in what inspires me and my paintings, you can discover more by clicking here.
We have a free newsletter and would love you to be part of our community; you can subscribe to the newsletter by clicking here. If you have any questions, I would be happy to talk to you. You can reach me, Anita, by clicking here.
Subscribe to our Anita Louise Art YouTube Channel, filled with great videos and information by clicking here.
Join us for our podcast “5 Minutes With Art.” Spend just 5 minutes a week with us to discover and learn about great art and artists. You can find out more about our podcast by clicking here.
Related Questions
What are some steps to painting a cat?
The steps to painting a cat are very similar to painting a bird, dog or any kind of animal. We use all these same seven steps for any animal we paint.
You can read more about how to paint a cat by reading our blog 7 Easy Steps to Painting a Cat by clicking here.
How Do I Plan to Start a Home-based Art Business?
If you are considering starting a home-based art business, you should first try to understand what your goals are in starting your home-based art business. You need also to be sure that you have a proper place in your home where you can operate your business. But, all of this will not matter if you are not producing high-quality artwork on a consistent basis.
To find out more about starting a home-based art business, you can read our blog Planning to Start A Home-based Art Business, What To Consider by clicking here.