If you know how to layout your painting onto the canvas, it can make your painting easier. It will also help you to get the proportions on your painting correct.
We have six very easy steps to lay out our painting on the canvas properly. We first lay out our painting on Procreate. Once we have it laid out on Procreate, then we will print it out. We like to print it out in the size of our actual canvas so that we can use the print to trace it onto the canvas. Once we have traced it on the canvas and checked and filled in the lines we need then we are ready to start painting.
Table of Contents
Simplifying Your Canvas Setup: 6 Steps to Perfectly Layout Your Painting
Mastering the art of laying out your painting on the canvas is a game-changer. It not only simplifies the painting process but also ensures that the proportions in your artwork are accurate.
The belief that anyone can paint becomes more tangible when you begin with a well-structured canvas.
Having a canvas with the correct proportions laid out from the start can significantly ease the painting process, making it more approachable and enjoyable from beginning to end
We believe that anyone can paint, especially if you can first start with a canvas that is all laid out with correct proportions. This will make it much more accessible throughout your entire painting process.
Here are our six easy steps to help you layout your painting correctly:
Step 1 – Layout Your Painting On Procreate
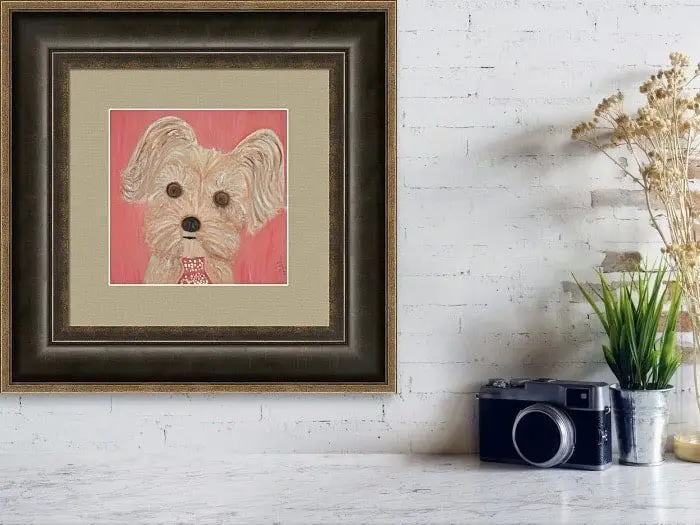
Whenever it is possible, I will lay out my oil painting first on Procreate. I do this especially when painting something like a dog or cat, and I need to make sure the proportions are as correct as possible.
Procreate allows me to work off the canvas before I actually start to paint anything. One of the great things about this is that it allows you to have an idea of what the painting could be like before you start to actually paint.
To find out more about this you can read our blog on Procreate to Layout your Oil Paintings, What You Need to Know by clicking here. We show you why we like to use Procreate to lay out our oil paintings. We feel Procreate is a great tool to layout your paintings before you put anything on canvas.
You can also watch our video below on the steps we use to layout our paintings on Procreate.
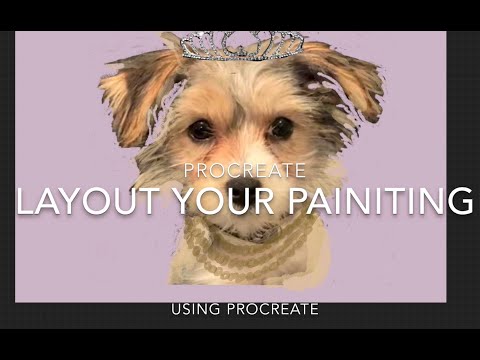
The great thing about using Procreate is that it can give you an idea of what your painting may look like before you even start to paint it. I find this helps to save me time during the painting process as I already have an idea and plan in mind as to how my painting can look.
But even with that, many times when I am painting, I may feel that I need to paint something different. So I use my layout as a guide but will still change colors and other things as I am actually painting. This is all part of the creative process.
Step 2 – Print Out the Photo
If you are going to paint something that requires you to get the proportions very close to the photo, then I will always print out the Procreate photo in the size that I want for my painting. If my canvas is for example, 20″ x 20″, then I will print my photo 20″ x 20″ for the actual photo but may have a paper size that is larger as 25″ x 25″.
I will often print my Procreate out in color or publish it in black and white and have a smaller print in a color print that I can paint from. I always paint with a color print in front of me as a reference.
Today, there are so many ways you can use technology to help you with your painting. Indeed, one way is to get a very good printed copy that you can use as your model for your painting.
Step 3 – Use The Print to Layout the Painting
Once I have printed my Procreate print in either a large black and white print or a color print, I will use this as the basis for my oil painting lines and sketches. I will use it help me to get it down on the canvas.
There are two ways that I will do this:
- Trace onto tracing paper – Sometimes, I will trace and outline the Procreate print onto tracing paper. This will give me the shape and lines I need to get some good proportions.
- Use the Procreate Print – You can use the Procreate print to trace directly onto the canvas. Lately, I have been using this step not to have to use the extra step of tracing paper. If the print needs it, I will use the tracing paper to outline my painting.
Step 4 – Trace and Outline On the Canvas
Now that I have the print all setup, the next thing I will do is place the print and layout onto the canvas. By doing this, I do not need to spend a lot of time trying to guess the proportions of the painting, and I can get it as accurate as possible.
Here is how I will do these steps:
- Use my tracing paper or print in the exact size for my canvas. I will then put charcoal all over the back of it.
- I will tape the tracing paper or print it onto my canvas using masking tape. I do this because you do not want it to move when you are tracing onto the canvas. I also use masking tape as it will not damage the print or the canvas.
- Then, you can start to trace or outline the areas you want. I will try to summarize as much as I can as I find it so I can get the best start on my painting. I will even mark or try to outline areas that may need shading or color changes. This way, when I start to paint, I do not need to guess much, and I have a rough guide. Sometimes, trace with a colored pencil as red to see exactly where you have put the lines. I never use a red pencil on the actual canvas.
- Once I have completed this, I will carefully take the print or tracing paper off the canvas and make sure I have put in all the lines that I need to into the canvas.
Step 5 – Fill In the Lines
Once I have taken the paper or the tracing paper off the canvas, I will check the lines. If you did not use enough of the charcoal on the back of the tracing paper or print, you may have missed areas of the design.
This is why with the tracing paper method, you can more easily go back to try to line it up and fill back in the lines. When using just the print, that is much more difficult.
I will then get out my pencil and pencil in the lines I just put on with the charcoal. If the charcoal is good enough and I can use it as a guide, I may just leave the charcoal as my guide.
But one of the main things I will do at this step is I will then also use the pencil to fill in any lines or areas that may have been missed. My goal is to come out of these steps with enough guides on the canvas that I can use to paint in the size, shape, and proportion that I want.
Step 6 – Start Painting
Now that your painting is laid out and set up, and you have a penciled layout, you are ready to start to paint. Your outline should be able to help you get pretty close to the correct proportions.
We believe that anyone can learn to paint. One of the most important steps you can do to ensure your painting turns out is to lay it out correctly before you even begin to paint. These steps that you take before you start painting, will make all the difference for your finished painting.
Anita Louise Art is dedicated to art education, great artists, and inspiring others to find and create their art. We love art that uplifts and inspires. #ArtToMakeYouSmile! #ArtToMakeYouHappy!
If you want to see any of my art, you can find out more by clicking here. If you are interested in what inspires me and my paintings, you can discover more by clicking here.
We have a free newsletter and would love you to be part of our community; you can subscribe to the newsletter by clicking here. If you have any questions, I would be happy to talk to you anytime. You can reach me, Anita, by clicking here.
Subscribe to our Anita Louise Art YouTube Channel with great videos and information by clicking here.
Join us for our podcast “5 Minutes With Art.” Spend just 5 minutes a week with us to discover and learn about great art and artists. You can find out more about our podcast by clicking here.
Related Questions
What Are Some Ways To Use Gold Leaf On Your Paintings?
Gold leaf is a beautiful material to add to your paintings. Gold leaf is made out of either real gold or bronze. Some gold leaf material can oxidize over time, so when you are painting, you may want to take this into consideration. Gold leaf is a very fragile material to work with. It can be messy to work with gold leaf. You can apply the gold leaf onto your canvas by using paint. Be sure to give it enough time to dry, or you will have problems with your gold leaf application.
You can learn more about using gold leaf in your paintings by reading our blog 5 Tips To Using Gold Leaf On Your Paintings by clicking here. We give you some tips and information on using gold leaf for your paintings.
What Are Some Traits An Artist Needs?
There are traits that any artist should acquire, such as inspiration, the power of observation, and the ability to develop a good memory and having inspiration. It is also good to create the art of persistence, patience, and discipline. If an artist can see life as a great adventure, it will help them in life and their artwork.
You can find out more about what traits an artist should try to acquire by reading out blog 9 Traits That Are Important for Any Artist to Acquire by clicking here.